
This guide covers everything in the Events tab. How to run reports on events, export data and send bulk emails.
Click the Events tab in the Festival Management Console.
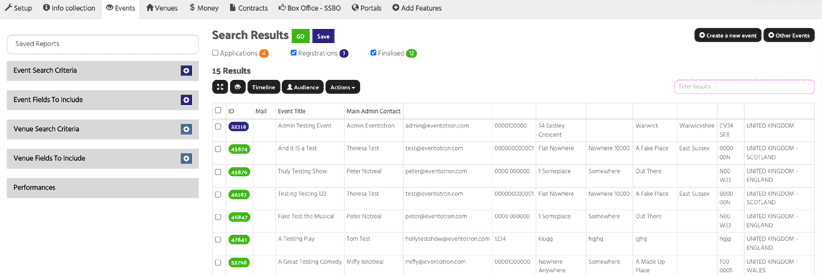
The Search Results default to the full list of events in your festival / season. Under Search Results are three tick boxes; Applications (orange), Registrations (navy blue) and Finalised (green), which display the number of events at each phase – you can filter results based on these criteria. Just tick or untick as appropriate.
Search Options
Event Search Criteria
Click on the plus icon in the Event Search Criteria bar. A pop-up Search Criteria box will appear, with an Add a field dropdown. All the fields in your Info Collection appear in this dropdown. Select which field you want to search by. Depending on the nature of that question field, you will then see a further option.
For example, if you have asked for Number of performers in Info Collection, this will appear as a Search Criteria, once selected you will see three options: Equals, Greater than and Less than – select the option you want and then put the number of performers you are looking for in the text box, click Add.
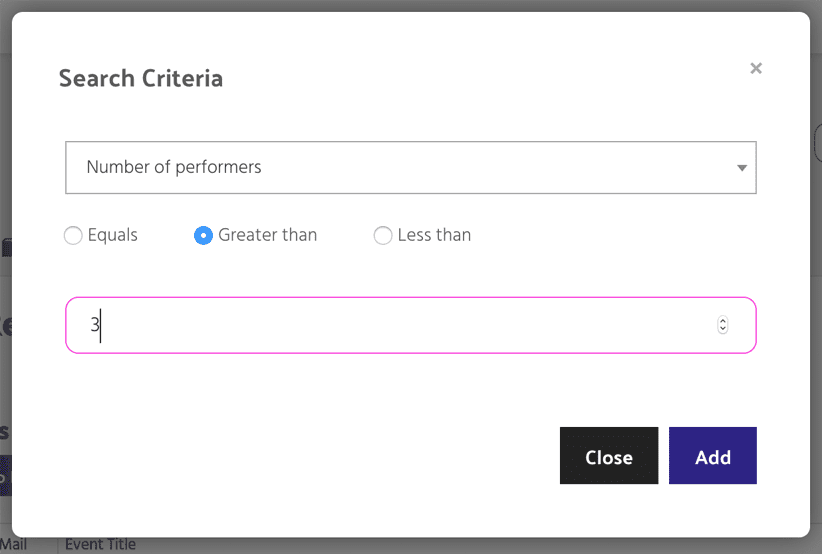
You can continue to add further search criteria relevant to your report. Once you have added all the search criteria, click Close.
Your search criteria will appear in blue tabs under Event Search Criteria – you can delete any you don’t want using the trashcan icons.
Event Fields To Include
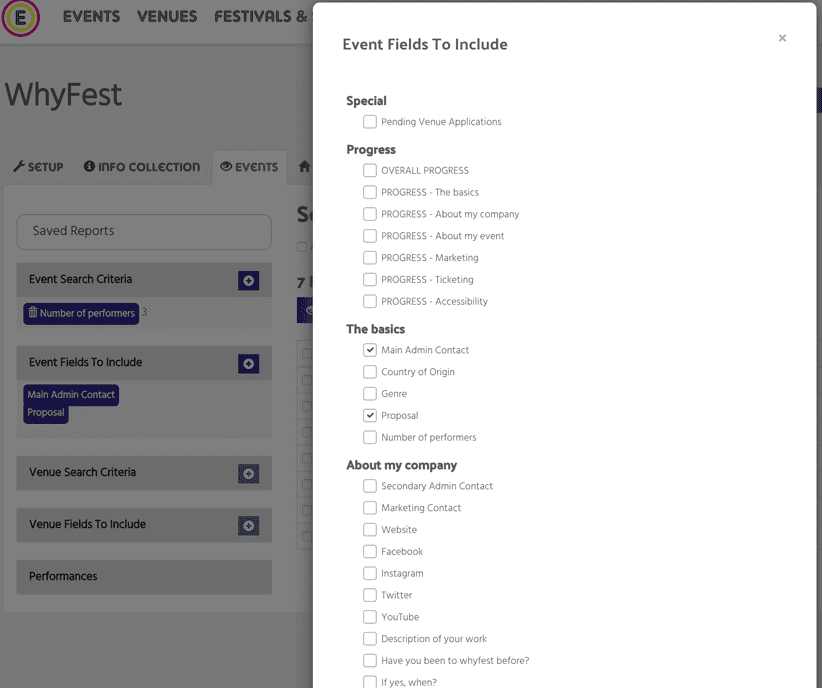
Once you have specified your Event Search Criteria, you can chose which fields you want to include in your report. Click the plus icon in the Event Fields to Include bar. A pop-up will appear with all the fields in your Info Collection. Tick the fields you want to see in your report and then click Close at the bottom of the pop-up window.
Venue Search Criteria
Click on the plus icon in the Venue Search Criteria bar. A pop-up Search Criteria box will appear, with an Add a field dropdown. All the venue fields appear in this dropdown. Select which field you want to search by. Depending on the nature of that field, you will then see a further option.
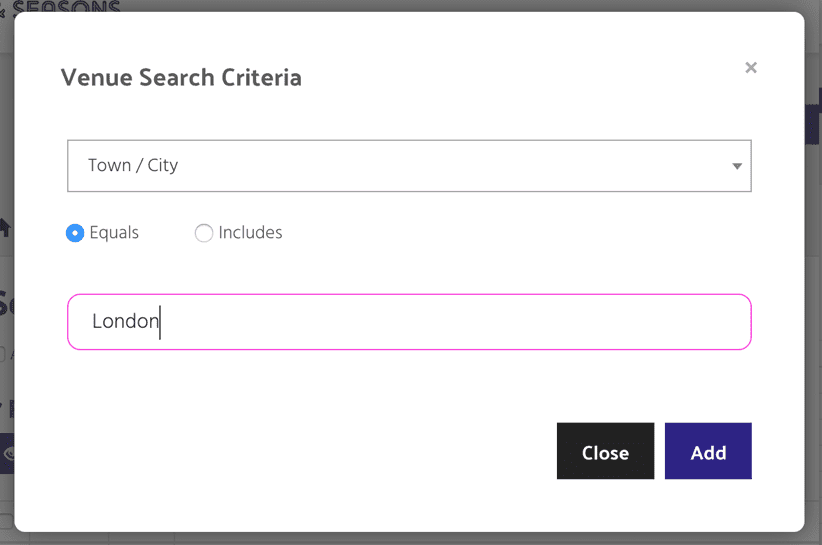
For example, if you want to search on venues in a specific Town / City, select Town/City from the search criteria dropdown and then two boxes will appear – Equals and Includes, choose which you want and type the Town/City name in the text box. Click Add.
You can continue to add further search criteria relevant to your report. Once you have added all the search criteria, click Close.
Your search criteria will appear in blue tabs under Venue Search Criteria – you can delete any you don’t want using the trashcan icons.
Venue Fields To Include
Once you have specified your Venue Search Criteria, you can chose which fields you want to include in your report. Click the plus icon in the Venue Fields to Include bar. A pop-up will appear with all the venue fields. Tick the fields you want to see in your report and then click Close at the bottom of the pop-up window.
Performances
Use this section if you want to see Performance dates and times in you report. Tick Show individual performances in results to see each performance date and time of every show in your report.
Tick Select all dates – this will highlight the total run of your festival/season, you can then click on individual dates in the calendar to deselect those you do not want to include in your report.
Start Time – To allows you to filter results based on event start time
Running Time – allows you to filter results based on the running time of events. Select +, < or > and input a running time
Price – allows you to filter results based on price. Select +, < or > and input a price
Once you have set all the criteria and fields to include in your report click GO
Depending on the amount of data you are searching this could take a few seconds.
You will then see your results.
You can save the report by clicking Save (next to GO) and giving your report a name. It will appear in a dropdown under Saved Reports.
You can look at the details of any event in your report by clicking the blue ID number, this allows you to scroll through the Info Collection for individual events using the arrowed buttons at the bottom of the pop-up. The arrows at the top right of the pop-up allow you to scroll to the next event in the report. To exit the pop-up, just click outside of it on the reports page.
Results toolbar
Four arrow icon – expands the table to fill the screen
Eye icon – allows you to collapse and expand the table cells so it’s easier to view report results
Timeline – select the events you want to view, click timeline to view a chart of performance dates and times. You can drag and drop to make quick scheduling changes.
(Audience – visible to clients using Super Simple Box Office – SSBO – displays the audience data for selected events)
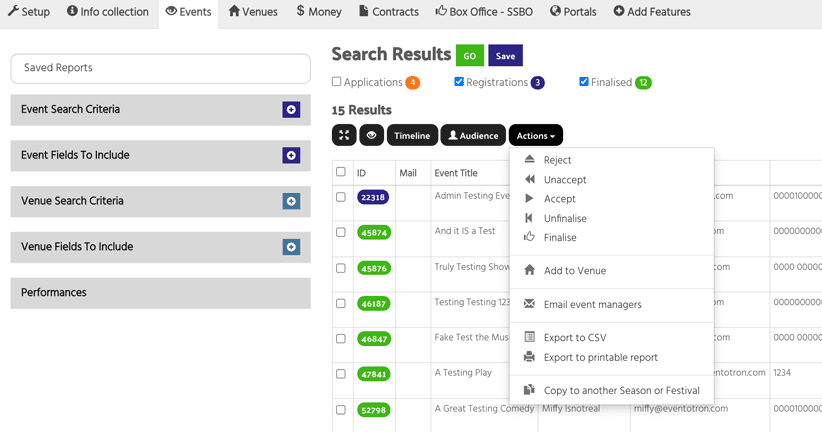
Actions – this dropdown gives you the following actions:
Reject – allows you to reject events that have applied to your festival/season
Unaccept – allows you to unaccept events that have applied to be part of your festival/season
Accept – allows you to accept events that have applied to your festival/season
Unfinalise – allows you to unfinalise events that have completed the application process and finalised.
Finalise – allows you to finalise events that have completed the application process
Add to venue – allows you to quickly add an event to a venue
Email event managers – bulk email selected recipients
Export to CSV
Export to printable report
Copy to another Season or Festival … – Allows you to copy events to a new festival/season (for use when a festival is cancelled or postponed)