This guide will help you set up your application and registration forms to collect all the information you need from events.
Every Festival or Season has its own requirements when it comes to taking applications from events wanting to be part of the programme. Eventotron’s Info Collection tab in the Festival Management Console provides customisable questionnaires so Festival/Season Managers can build forms that exactly meet their needs.
Getting started
Click the Info Collection tab in Festival Management.
Finalise Bar
Click on the grey Finalise Bar underneath your festival/season logo. You will see this:
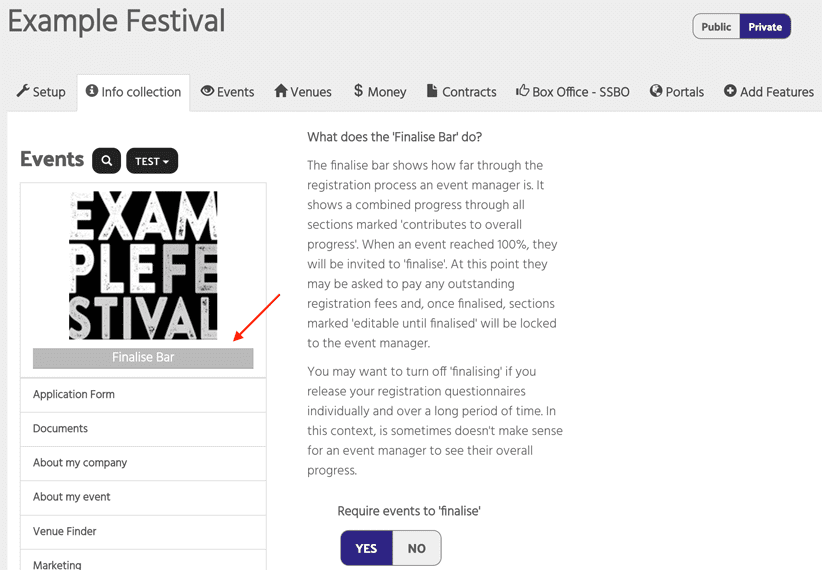
If you want events to see their progress through your registration process then flip Require events to ‘finalise’ to Yes. You can then change the ‘Ready to finalise’ and ‘Finalised’ text and determine which sections you want to contribute to finalising.
Create a new event section
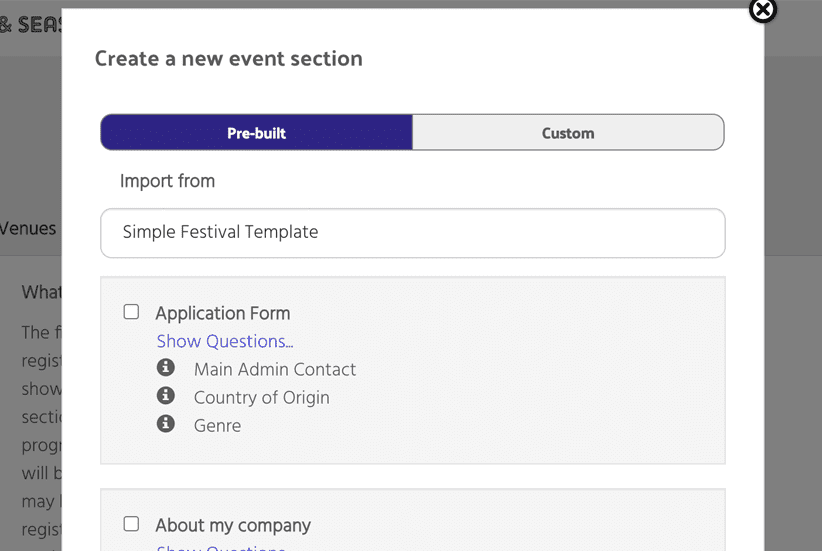
Click on the create a new event section blue plus button. You will be given two options – pre-built or custom. Pre-built allows you to import sections from your previous festivals / seasons or from an Eventotron template.
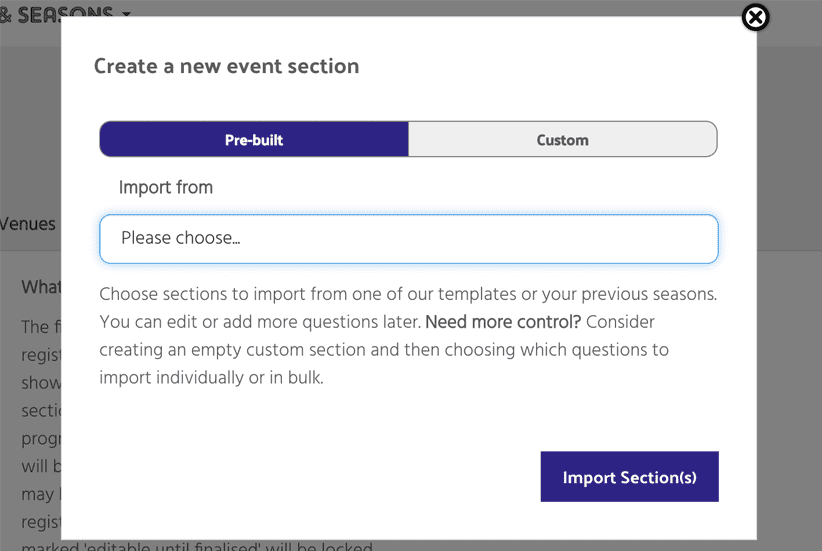
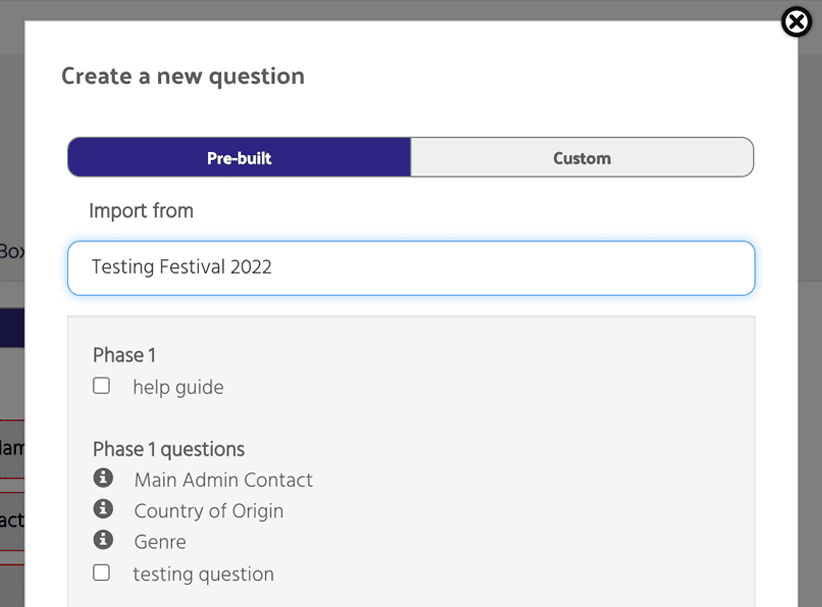
Questions with an ‘i’ icon next to them already exist within your forms. Simply tick the section/s you’d like to import and click Import Section(s) at the bottom of the pop-up.
Custom allows you to build new sections from scratch. Give your section a title and choose whether it is a regular questionnaire or a multi-item questionnaire. Most of your sections will be regular questionnaires. Multi-item questionnaires allow you to collect similar information about multiple things. For example, you might want to collect contact details for company members.
Event section options
Once you have created your section/s you can edit them. Click on your first section (it’s possible to re-order sections by simple drag and drop). A column with Questions and Options will appear, Questions is automatically highlighted and you will see a list of questions beneath. Click Options.
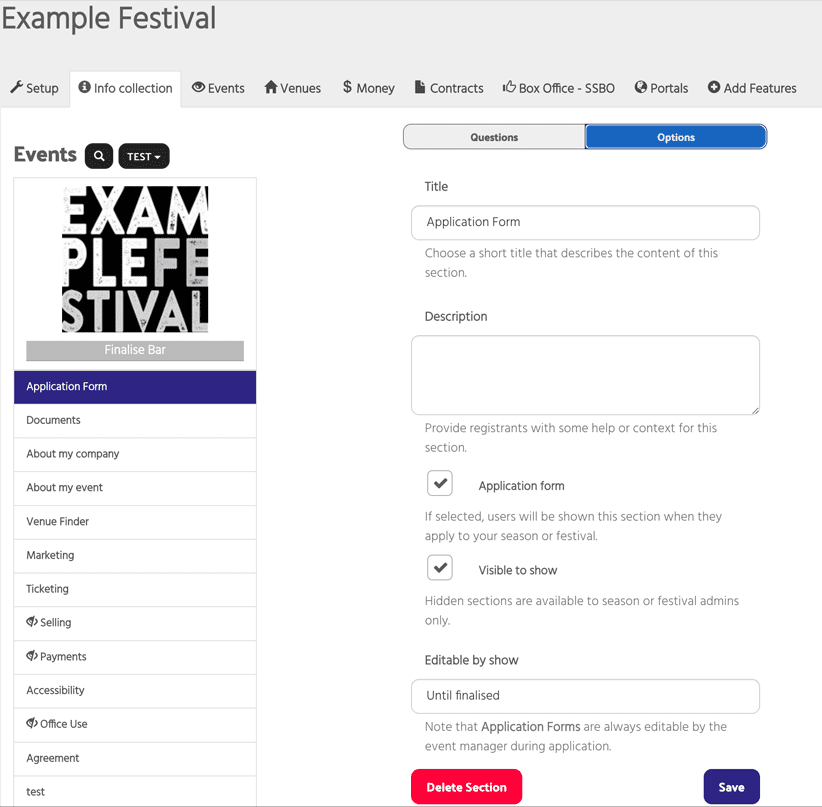
Here you can:
Edit the title of the section.
Add a description to give users some help or context of the section.
Select whether this section is to be shown to users when they apply to your festival or season. (If selected no further options are necessary.)
(If you have selected not to Automatically approve events under the Set Up / Options tab in Festival Management – you will receive a notification when a user completes the sections with Application form ticked, once you have approved their application they will have access to any further event sections you may have)
Select whether to make the section visible to users or to hide the section for festival/season admins only.
Editable by show – choose whether to allow events to edit the section. You can set this to Until finalised which means an event can return to the section and edit it up until they confirm they have finished the info collection process.
Select Venue required if you want to make the section un-editable for users until their event has been assigned to a venue.
Contributes to overall progress – If selected, the user will need to answer these questions before they can complete their festival/season application.
Email on completion – you can nominate a member of your team to be emailed once a user has completed the section.
Display If – If you want the section to only become visible based on the way a previous question has been answered. Chose the question from the dropdown and select the answer required to display the section. For example, if you ask whether it is a live or streamed event, you can then create a section to display only to those that chose live event.
Event Section Questions
Click back to Questions at the top of the column
Click on the first question
A column will appear on the right hand side with the question details.
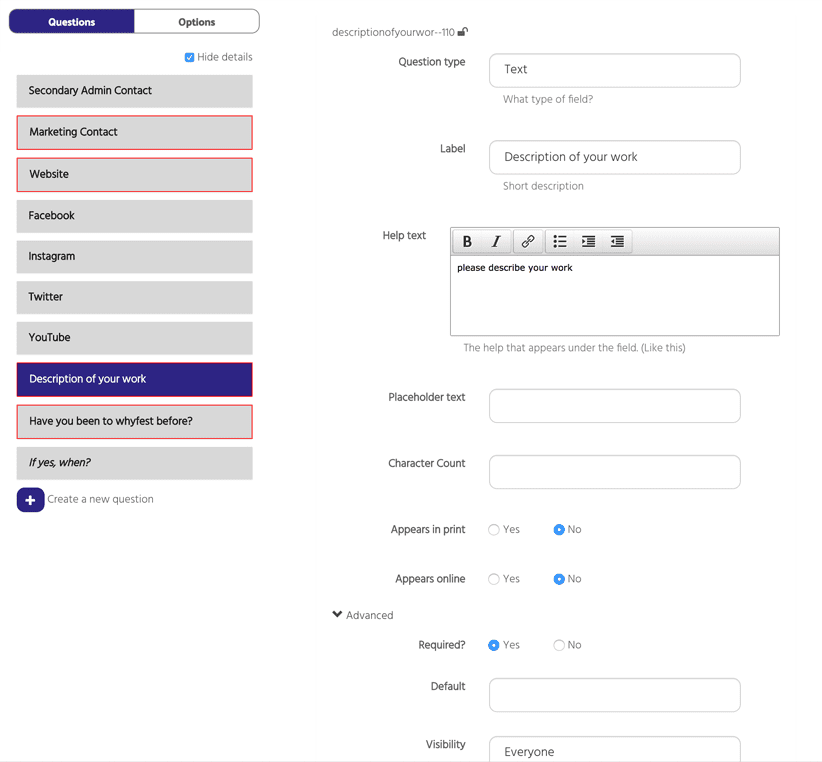
Question type (see summary of question types here) – choose from the dropdown list the type of field you want this to be. For this example we will use text as the question type.
Label – a short description of the question
Help text – short, helpful information that appears under the field to assist the user
Placeholder text – this appears in the field and can be used to further assist the user on how to answer the question. Can also be left blank.
Character Count – place a maximum limit on number of characters a user can input into the text field (Specific to the text question type) Can also be left blank.
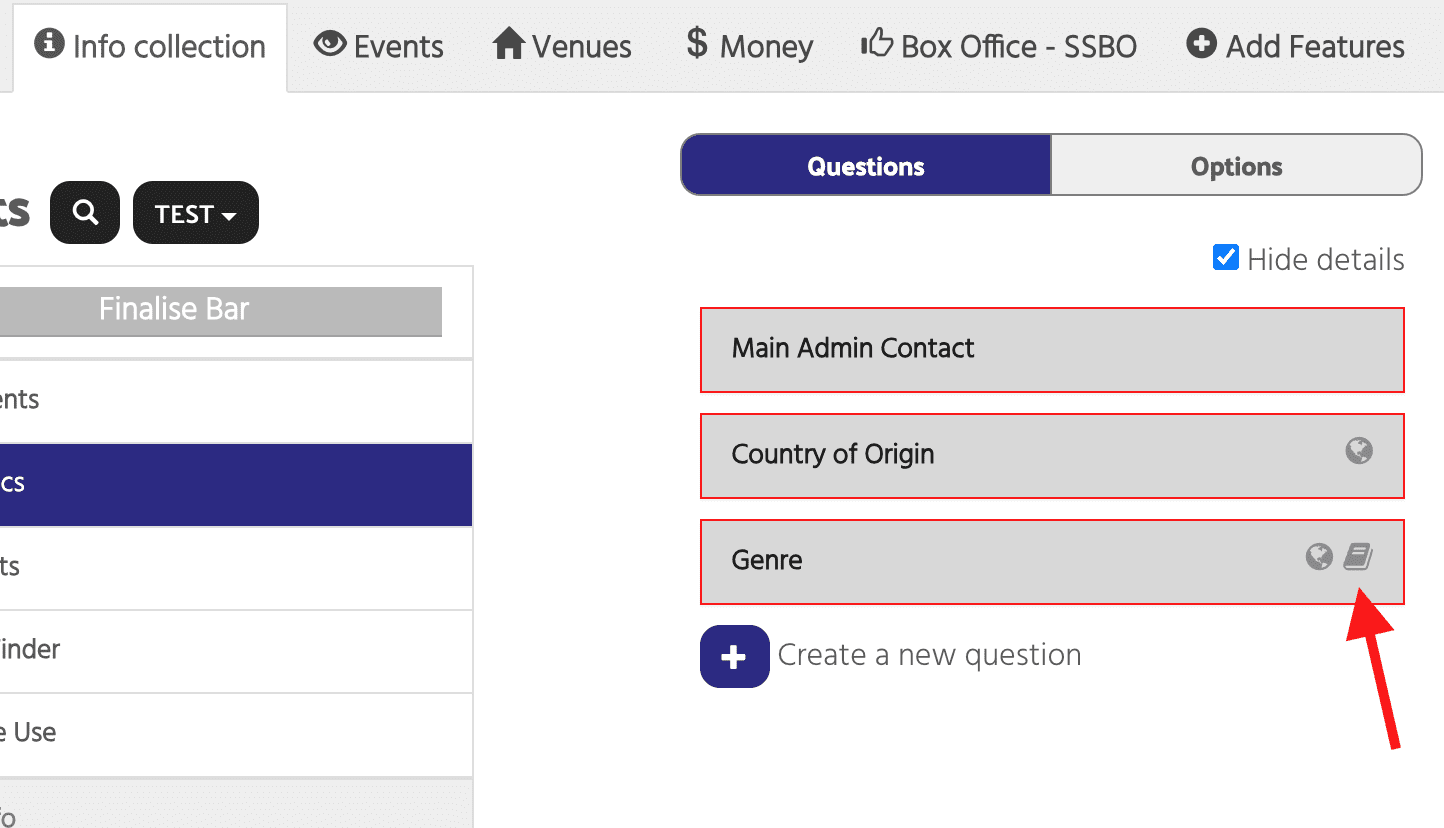
Appears in print – highlight yes or no depending on whether you want the response to the question to appear in a printed brochure/programme (questions that you have selected to appear in print will have the book icon)
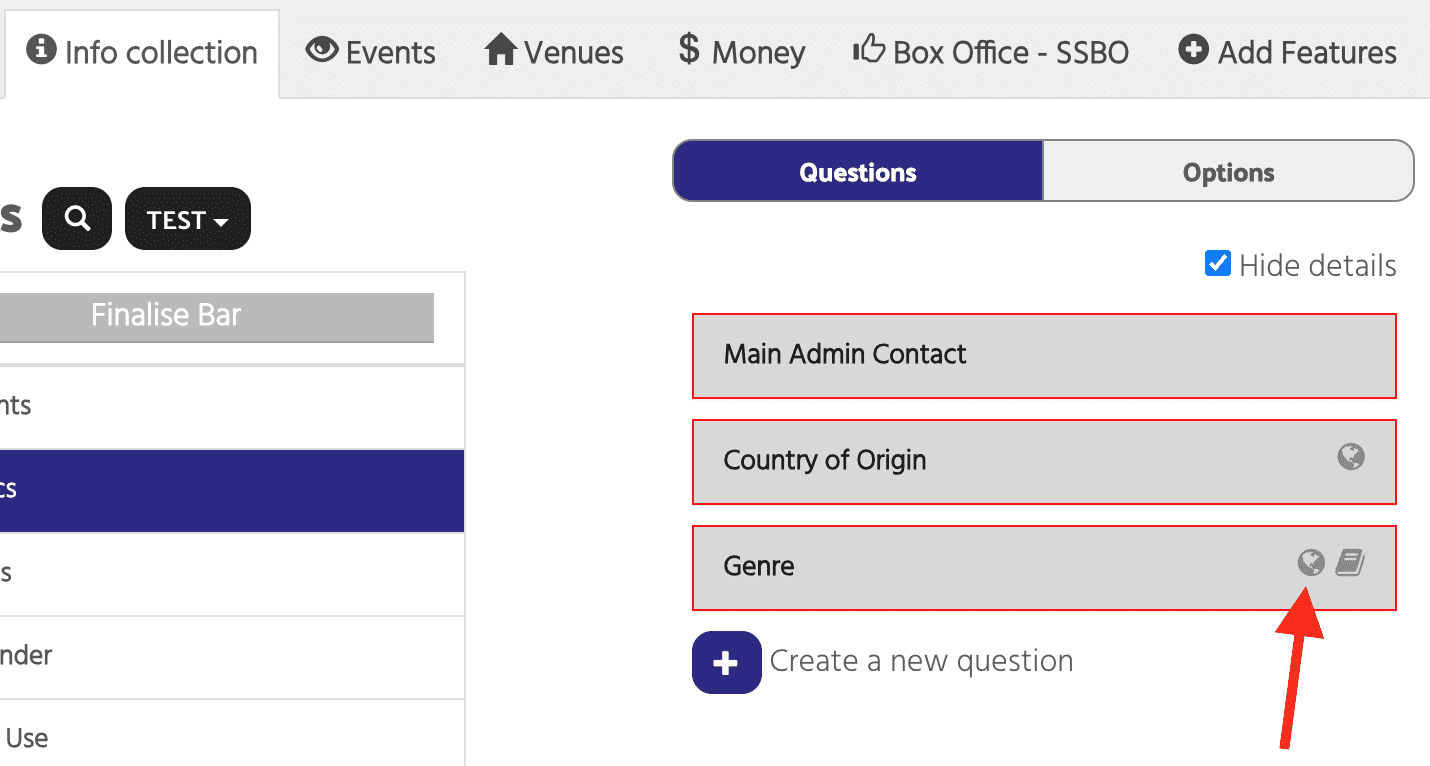
Appears online – highlight yes or no depending on whether you want the response to the question to appear in online listings (questions that you have selected to appear online will have the globe icon)
Advanced
Required – highlight yes if you want to make the question one that has to be answered before the user can move on to the next section and or complete the info collection process. Required questions have a red border.
Default – you can input a default response to the question here or leave it blank
Visibility – you can make the question visible to everyone or choose to hide it from users by selecting Admins only. By selecting Disabled for non-admins you allow everyone to see the question but only admins can change the response.
Notify – you can put an email address in here and that person will receive a notification whenever the question is responded to.
API Field name – this relates to when you use the Eventotron API to pull information from Eventotron to your website or apps. By inputting a sensible API field name that relates to the question you make all the data much easier to track. Your web developer will thank you for it. Please use only letters, numbers and underscores – no spaces or punctuation.
Display If
Here you can apply conditions to display the question based on previous answers given in the section. For example if you have a question like: Have you performed at this festival before? You can create a further question: If so, when? that is only displayed if the previous answer is Yes.
Click on Display If and choose the question from the dropdown list you want to make the current question a follow-up to. An Equals field will display – tick the response you want to display the current question:
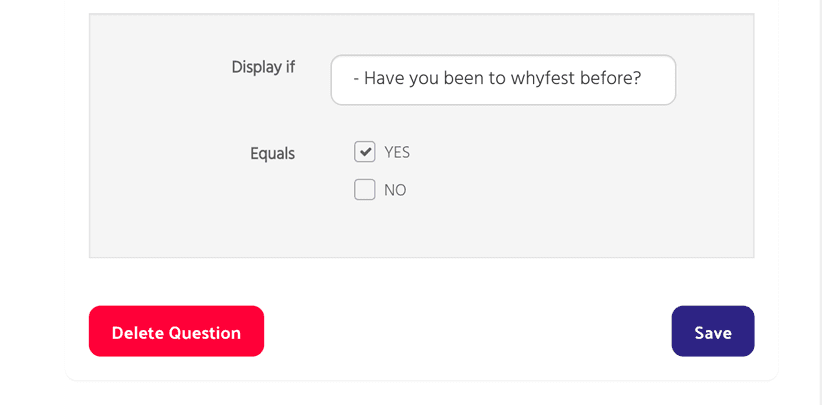
Conditional questions are in italics.
Click save.
That’s it, you have created a question in a section
To add another question to the section, just click +create a new question and, as with creating new sections, you can choose to import a pre-built question from an Eventotron template or a previous festival/season:
or start from scratch with custom:
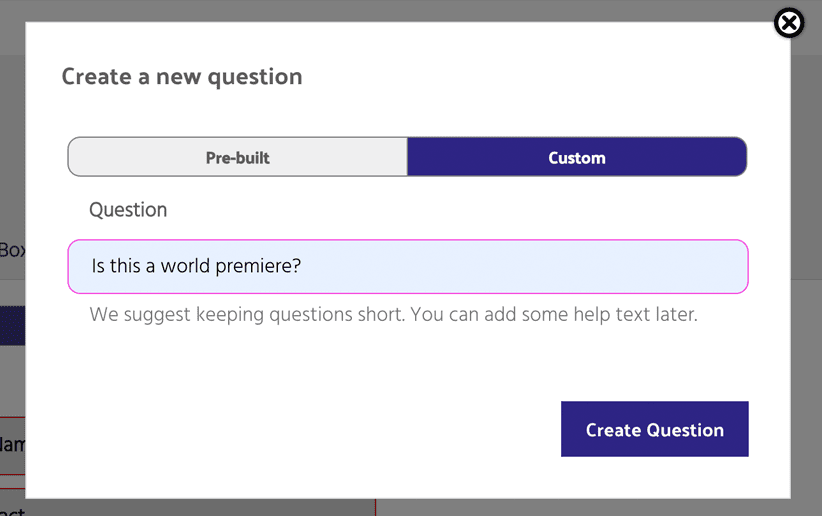
You can rearrange questions within a section by simply dragging and dropping.
You can delete a question by clicking Delete Question at the bottom of the right hand column.
Event sections
Click on the next section down (About my company in this instance). Click on Options. You can make this section a continuation of the Application Form by ticking Application Form, or you can make it the first section of the Registration phase by not ticking Application Form.
Add questions as detailed above.
