
You have all your events and venues plus dates, times and prices are set – now you need to promote shows and sell tickets.
Eventotron’s built in Super Simple Box Office lets you do this in a very quick and easy way. You just need to install the Eventotron SSBO plugin on your wordpress website. Here’s how:
Here are some quick links to help you navigate this guide:
Starting Soon and Nearby shortcode
Install the Plugin
Request the plugin from Eventotron
Go to your wordpress dashboard. Click Plugins and Add New. Upload the Eventotron plugin. Click Activate.
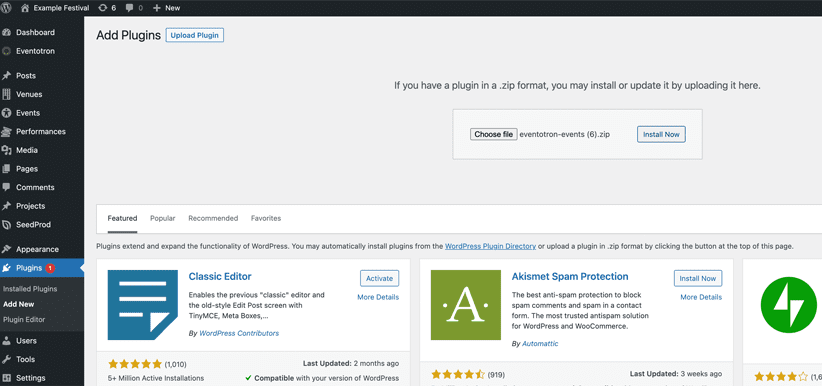
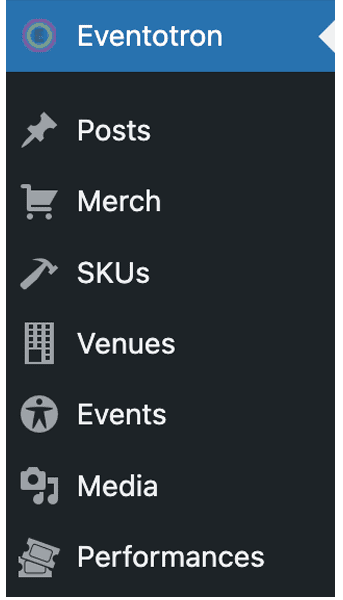
You will now see Eventotron in your dashboard menu. You will also see 5 new post types: Merch, SKUs, Venues, Events and Performances
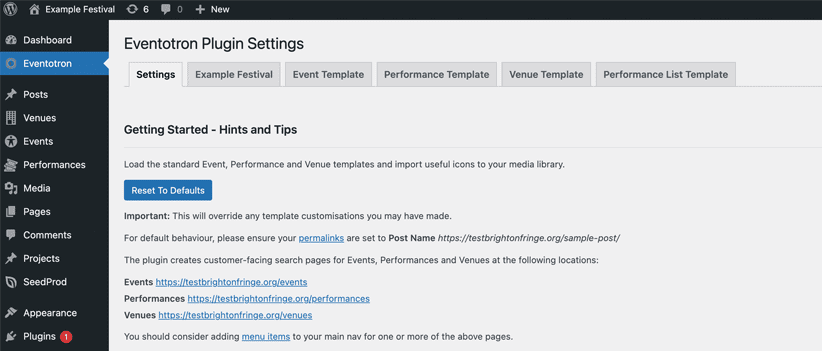
Click on Eventotron – you will be in the Settings tab.
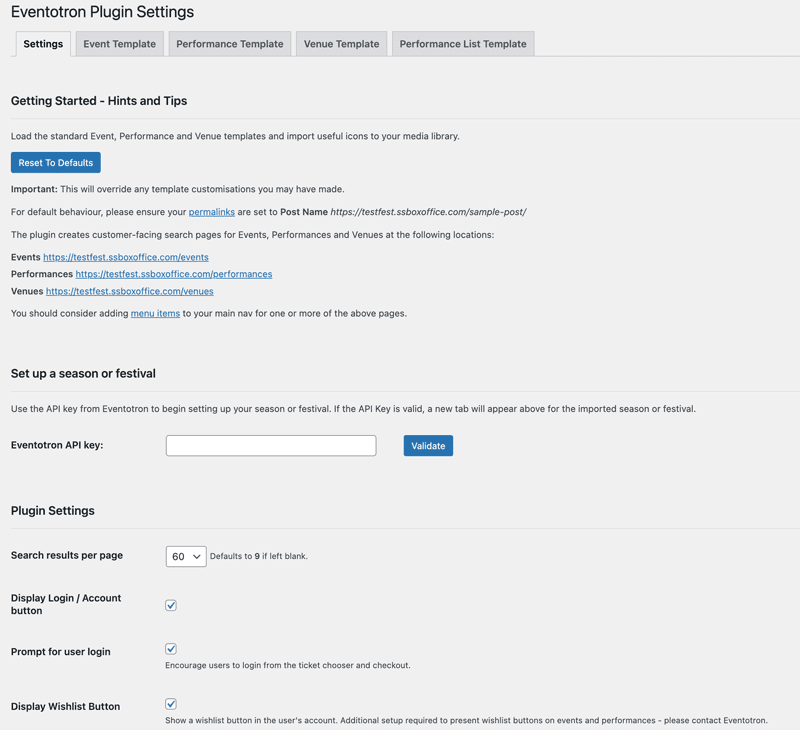
Getting Started
Load the standard Event, Performance and Venue templates and import useful icons to your media library. Click the Load Templates (unless you are building your own templates in which case leave as the default)
Ensure your permalinks are set to Post Name, for example: https://your.website/sample-post/ (you can check this and edit in WordPress Settings – Permalinks)
The plugin creates customer-facing search pages for Events, Performances and Venues at the following locations:
Events https://your.website/events
Performances https://your.website/performances
Venues https://your.website/venues
Merchandise https://your.website/merch/
You should consider adding menu items to your main nav for one or more of the above pages.
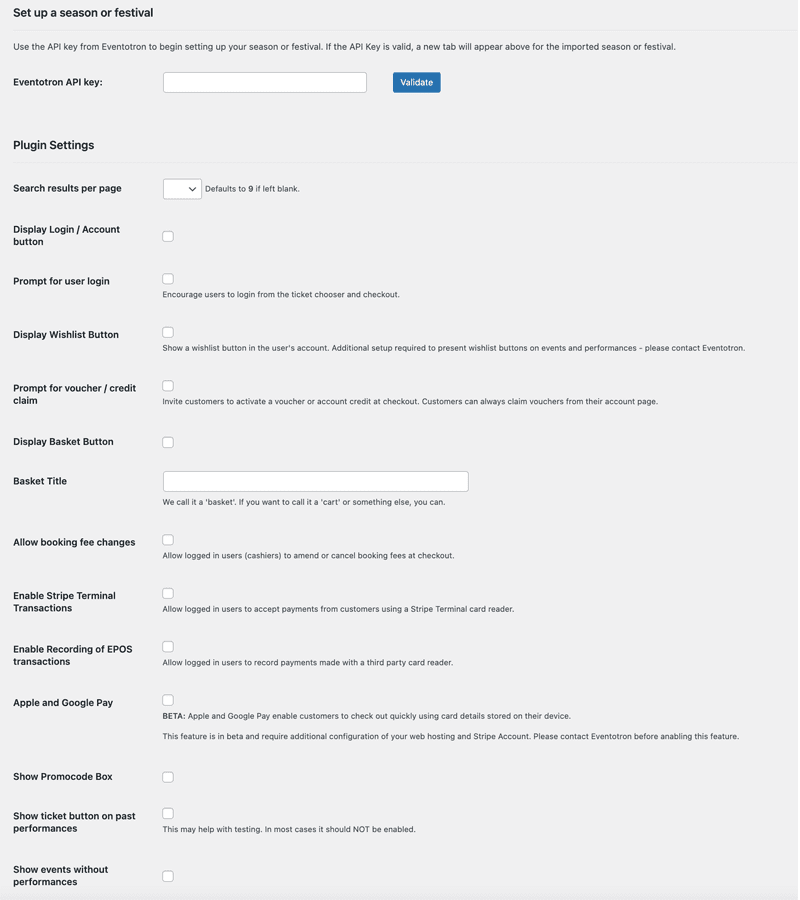
Import a season or festival
Open a new window in your browser and log into Eventotron. Go to your festival/season dashboard and click on Setup – API Keys
Put a name (eg: website) and then hit Generate new key
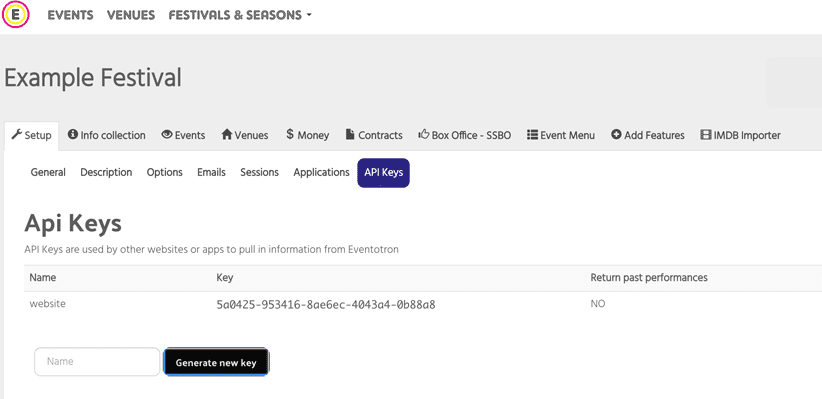
Copy the key, and return to your wordpress dashboard
Paste the API key into the Eventotron API key field in Eventotron Plugin Settings and click Validate
You will now see your festival or season as a tab.
Plugin Settings
Search results per page: Choose the number of search results you want per page (default is 9)
Display Login / Account button. Allow customers to create accounts and log in to retrieve tickets, manage payment methods, access member benefits etc.
Prompt for user login: Encourage users to login from the ticket chooser and checkout.
Display Wishlist button: Show a wishlist button in the user’s account. Additional setup required to present wishlist buttons on events and performances – please contact Eventotron.
Prompt for voucher / credit claim: Invite customers to activate a voucher or account credit at checkout. Customers can always claim vouchers from their account page.
Display Basket button: tick to display basket button in main nav
Basket Title: We call it a ‘basket’. If you want to call it a ‘cart’ or something else, you can.
Allow booking fee changes: Allow logged in users (cashiers) to amend or cancel booking fees at checkout.
Enable Stripe Terminal Transactions: Allow logged in users to accept payments from customers using a Stripe Terminal card reader.
Enable Recording of EPOS transactions: Allow logged in users to record payments made with a third party card reader.
Apple and Google Pay: BETA: Apple and Google Pay enable customers to check out quickly using card details stored on their device.
This feature is in beta and require additional configuration of your web hosting and Stripe Account. Please contact Eventotron before enabling this feature.
Show Promocode Box: Select if you are using promocodes
Show ticket button on past performances: This may help with testing. In most cases it should NOT be enabled.
Show events without performances: If you want to show events that are yet to have performances scheduled
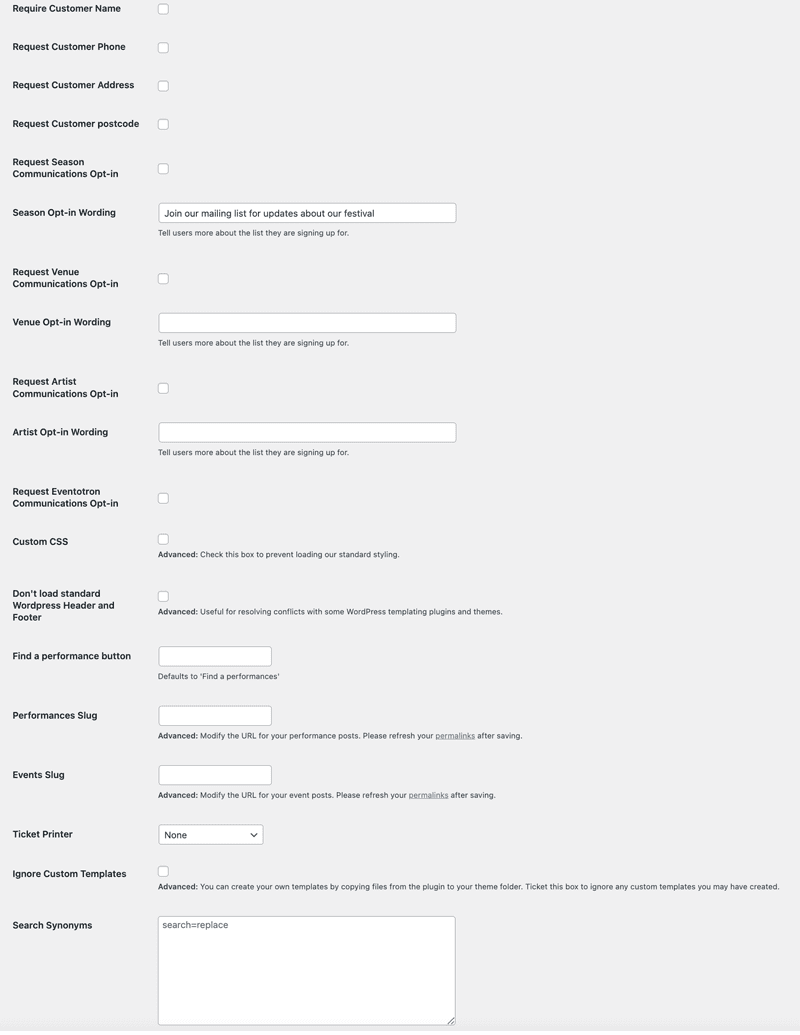
Require Customer Name: select to require customer name is inputted in the checkout process
Request Customer Phone – Select if you wish to collect this data
Request Customer Address – Select if you wish to collect this data
Request Customer Postcode – Select if you wish to collect this data
Request Season Communications Opt-in – Select if you want customers to have an opt-in to your mailing list
Season Opt-in Wording – Tell users more about the list they are signing up for.
Request Venue Communications Opt-in – Select if you want customers to have an opt-in to venue mailing list
Venue Opt-in Wording – Tell users more about the list they are signing up for.
Request Artist Communications Opt-in – Select if you want customers to have an opt-in to artist mailing list
Artist Opt-in Wording – Tell users more about the list they are signing up for.
Request Eventotron Communications Opt-in – Select if you want customers to have an opt-in to the Eventotron mailing list
Custom CSS – Advanced: Check this box to prevent loading our standard styling
Don’t load standard WordPress Header and Footer: Advanced: Useful for resolving conflicts with some WordPress templating plugins and themes
Find a performance button: Defaults to ‘Find a performance’
Performances Slug – Advanced: Modify the URL for your performances posts. Please refresh your permalinks after saving
Events Slug – Advanced: Modify the URL for your events posts. Please refresh your permalinks after saving.
Ticket Printer: Select a connected ticket printer if applicable
Ignore Custom Templates: Advanced: You can create your own templates by copying files from the plugin to your theme folder. Ticket this box to ignore any custom templates you may have created.
Search Synonyms: Enter a list of search=replace pairs, each on a new line, to improve search results.
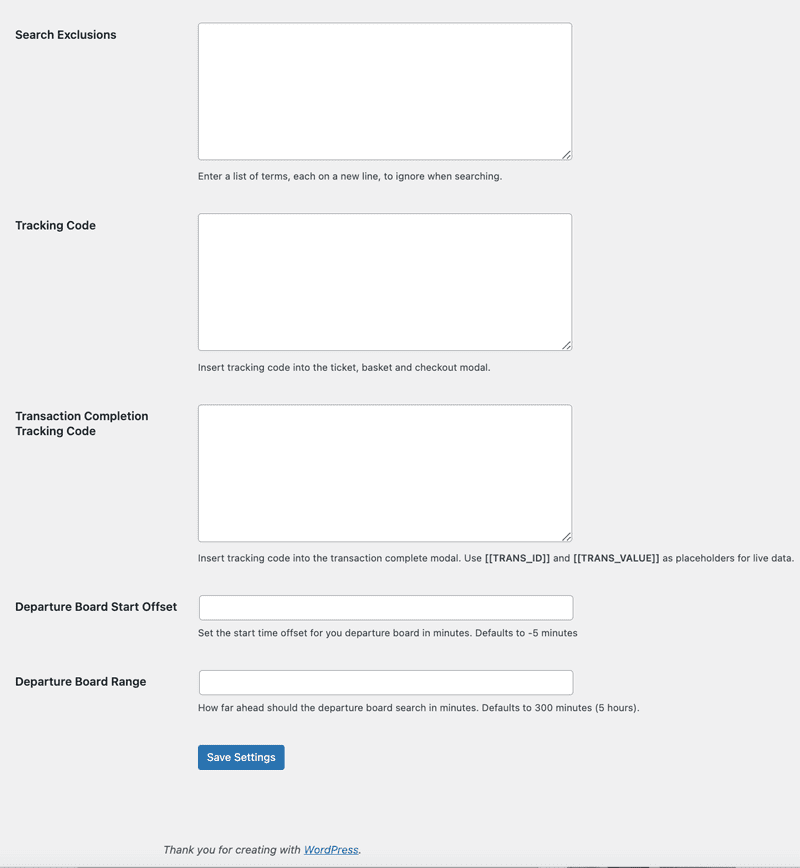
Search Exclusions: Enter a list of terms, each on a new line, to ignore when searching.
Tracking Code: Insert tracking code into the ticket, basket and checkout modal.
Transaction Completion Tracking Code: Insert tracking code into the transaction complete modal. Use [[TRANS_ID]] and [[TRANS_VALUE]] as placeholders for live data.
Departure Board Start Offset: Set the start time offset for you departure board in minutes. Defaults to -5 minutes
If you want to create a What’s On Next / Starting Soon & Nearby page to point customers to events starting soon near to their location – either leave the departure board start offset time as it is and it will display events up until 5 minutes after the start time or enter a different offset to suit your needs (this can be useful if your website is running off a server in a different timezone)
Departure Board Range: How far ahead should the departure board search in minutes. Defaults to 300 minutes (5 hours).
Change the range if you want events to appear on your What’s On Next / Starting Soon & Nearby page further ahead than 5 hours or on a shorter time span.
Hit Save Settings.
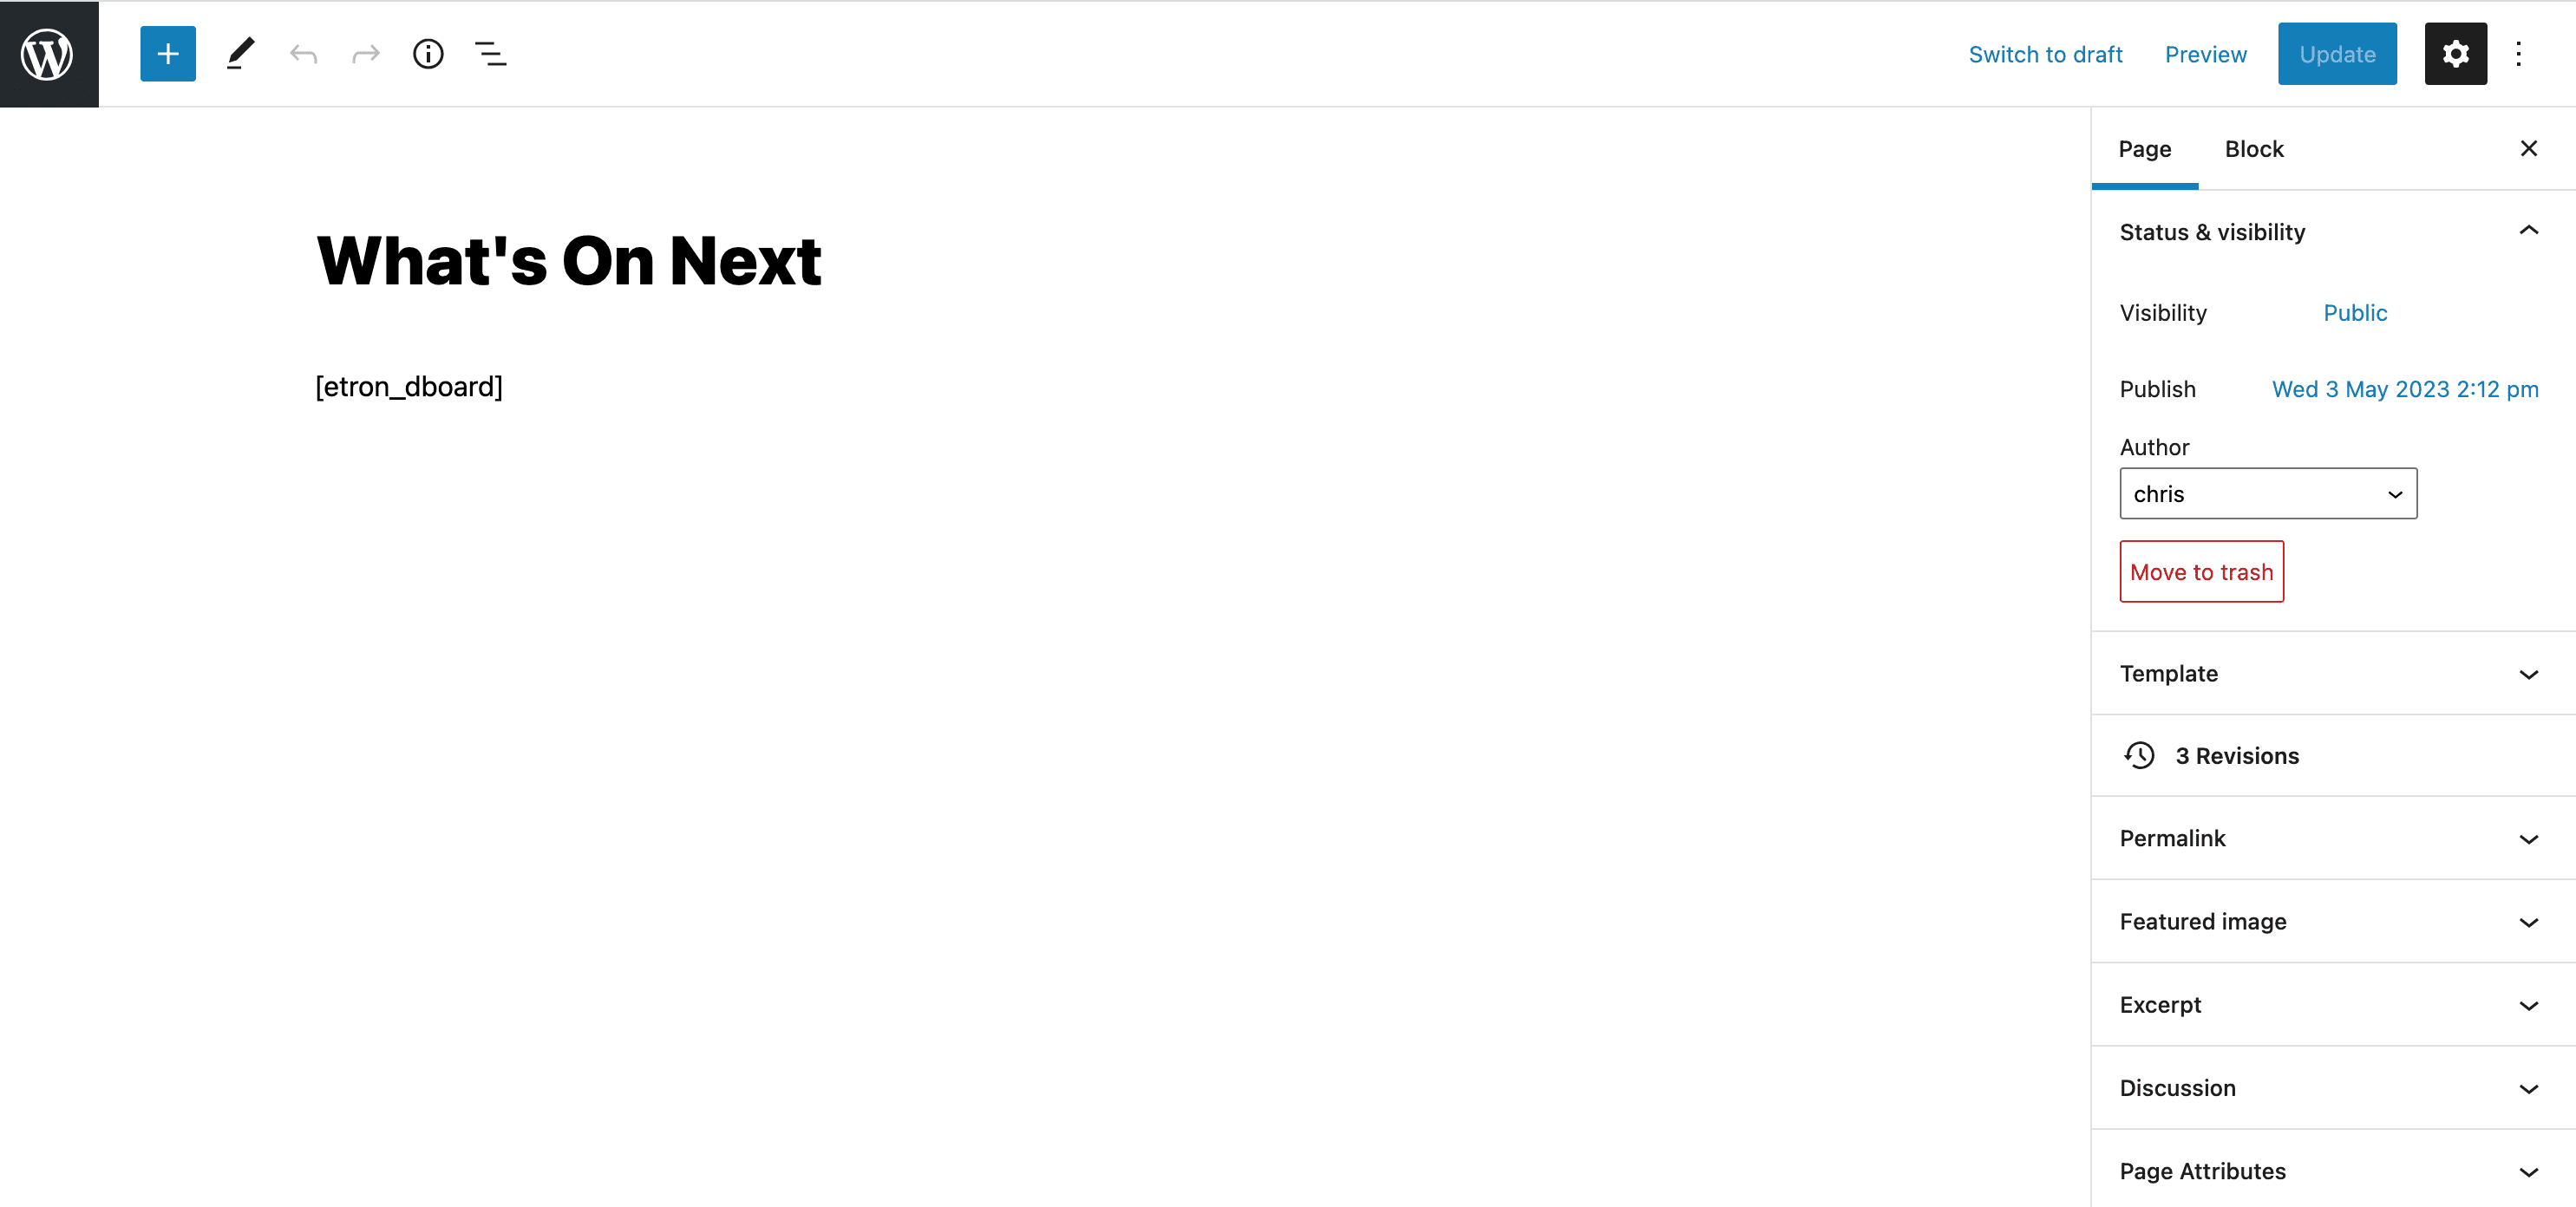
To create a What’s On Next or Starting Soon & Nearby page – just add a new page and enter this shortcode: [etron_dboard]

Season / Festival Set Up
Click on your festival / season tab
You will see the name of the festival/season start and end dates and the API Key you inputted and validated.
Check the Sell tickets box
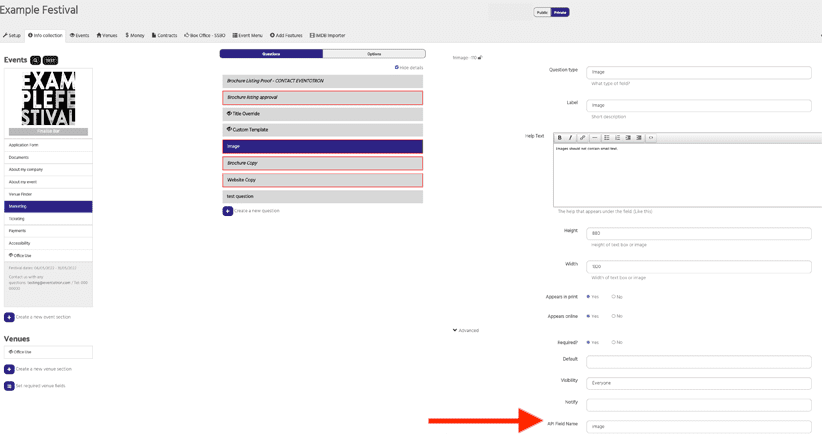
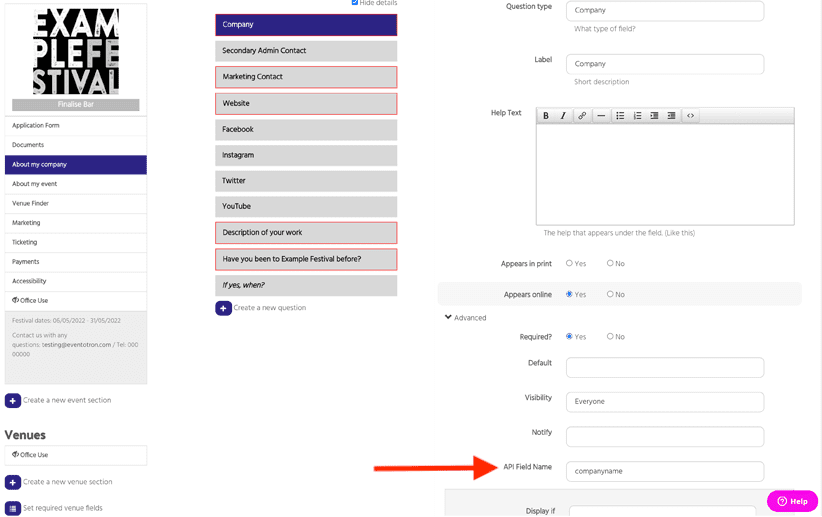
Now you need to match up the three main data fields. You must to make sure that you have inputted an API field name in Eventotron for the fields you want to have appear on your website.
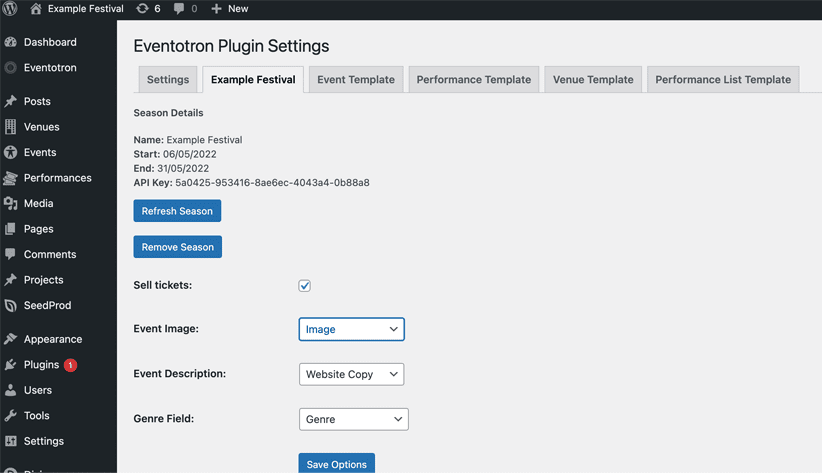
Event Image: – choose the API field name you have given your event images
Event Description – choose the API field name you have given the event copy you want to have appear on the website
Genre Field – choose the API field name you have given genres
Hit Save Options
You will see your events appear in the Available Events table
To import all events, tick the top box next to Event Name and click Import Selected Events
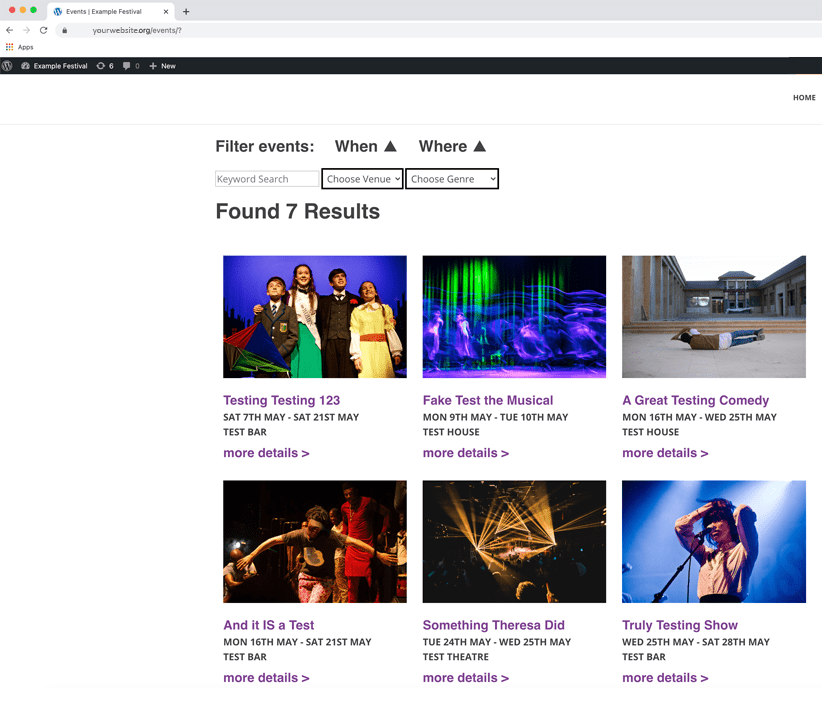
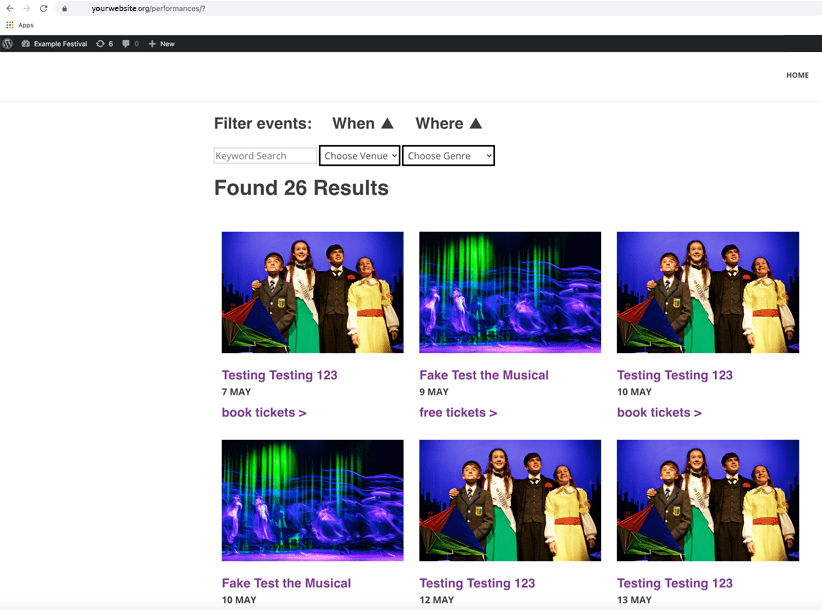
To check your progress go to the frontend of your website and put /events/ at the end of the URL: https://your.website/events/ and you will see those events you have just imported.
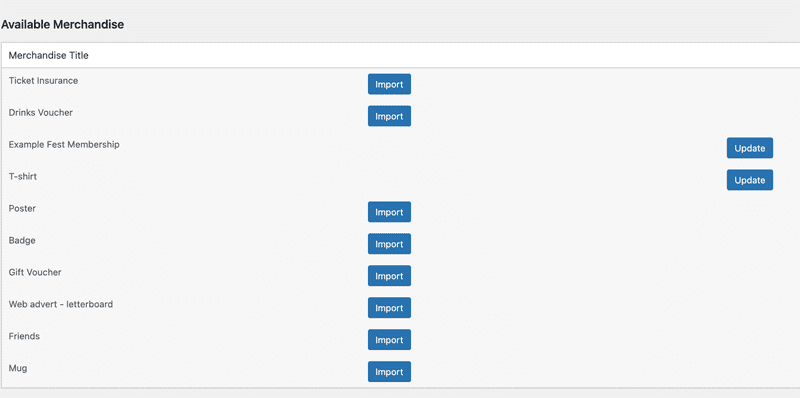
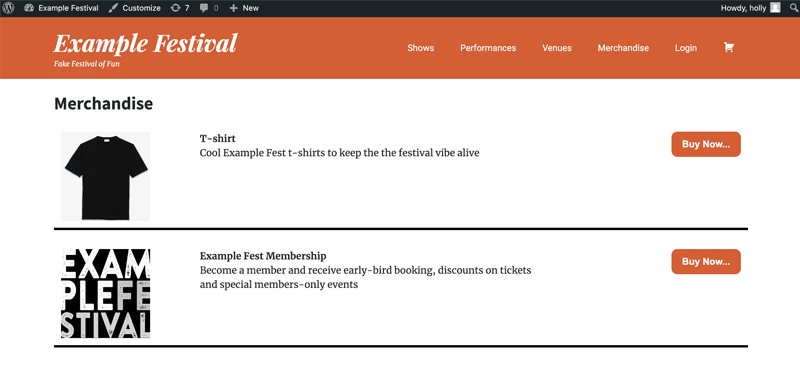
If there is merchandise set up in Eventotron (Add-ons in the Box Office – SSBO tab) this will also appear under Available Merchandise. Click import and to check progress go to the frontend of your website and put /merch/ at the end of the URL: https://your.website/merch/ and you will see the merch you have just imported.
Editing Templates
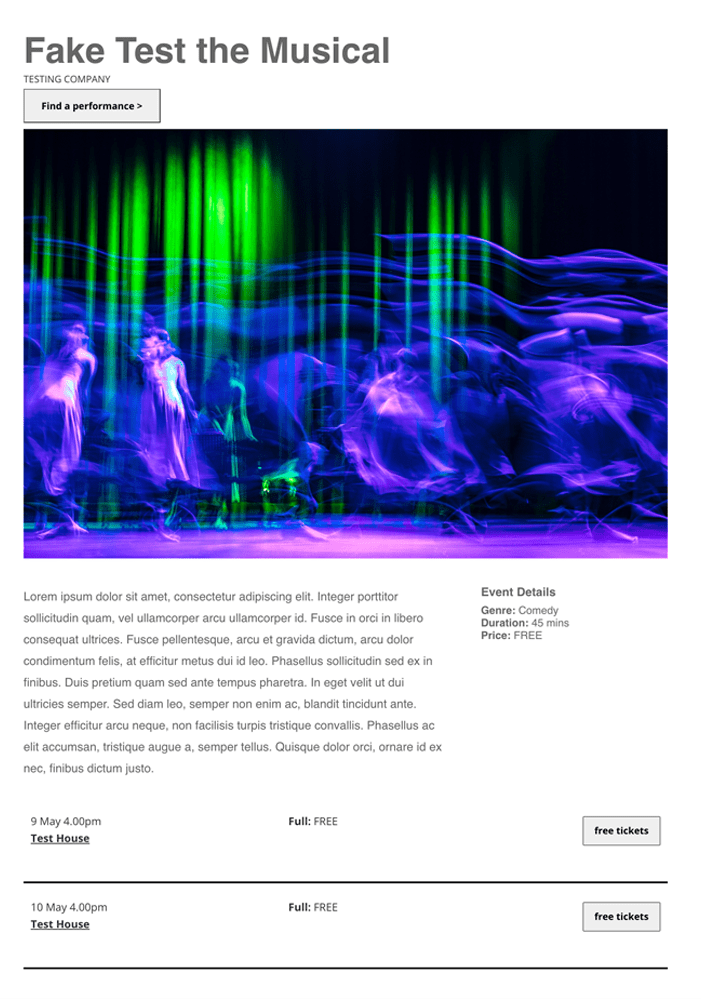
Event Template
Use this section to determine what information from Eventotron you want displayed on event pages, set up your results tiles and search filter options.
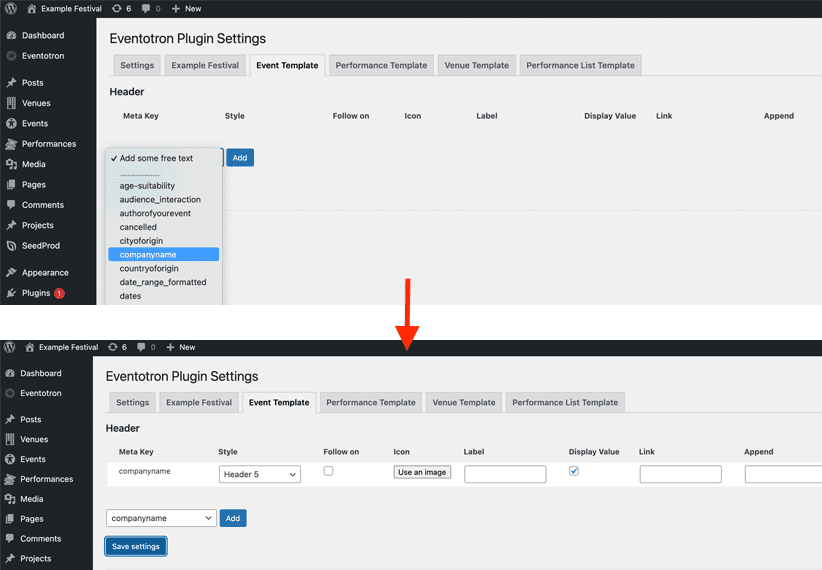
Click on Header – here you can add more information to the event header. For example you may want to include the company/artist name. Make sure you have assigned this field an API field name in Eventotron and then you will see it as an option in the dropdown. Select and click Add.
Now you will see your API field name (eg: companyname) under Meta Key.
Styling – choose any styling you’d like to apply
Follow on – tick this if you want the company name to follow on from the field above on one line (test this as it can look odd in some instances)
Icon – click and upload an icon you’d like to use to the media library or use one installed by Eventotron
Label – Insert a label if you would like one (for example Company name:)
Display Value – Tick this to display the data from the Meta Key
Link – Add a link if required
Append – Enter any text you would like to have appear at the end
To add any further information click on the Add some free text dropdown and select the meta key you want to have appear. You can reorder your information by simply dragging and dropping.
Save settings.
Social
Here you can add social media links. Facebook and Twitter are automatically included – to add another, click the dropdown and select the relevant meta key (eg: Instagram)
Set it up as you want (see above for details) in the link field, put the social media platform URL followed by /*
eg: https://www.instagram.com/*
(You need to make sure social media links have been added correctly in Eventotron for this to work. You could add the following advice in the help text: Do not include ‘www.facebook.com/’ )
Sidebar – this refers to the sidebar on the right– here you can add any information you want, follow the same process as detailed above.
More Info – this appears at the bottom of the event description. Add in anything you’d like here – maybe a quote or the company/artist website.
CSS – You can add CSS here
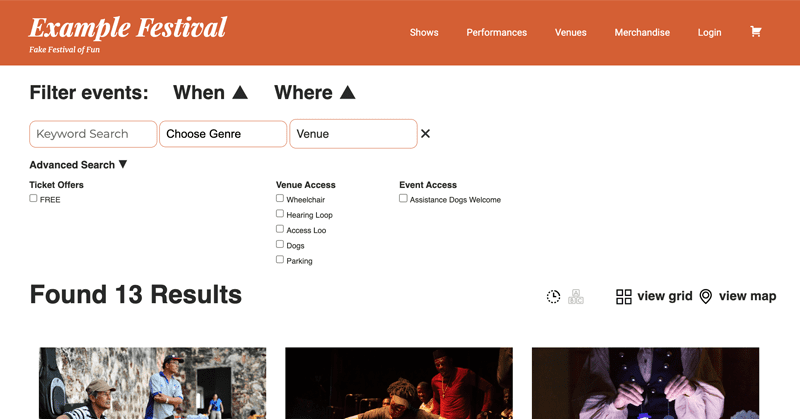
Filter Options
Tick which standard filters you would like to have appear.
You can add your own custom filters:
Custom Filter One – choose the meta key you would like to have as a filter (Venue for example) give the filter a name and select either dropdown or multi-select depending on how you want users to be able to search. Save settings.
![]()
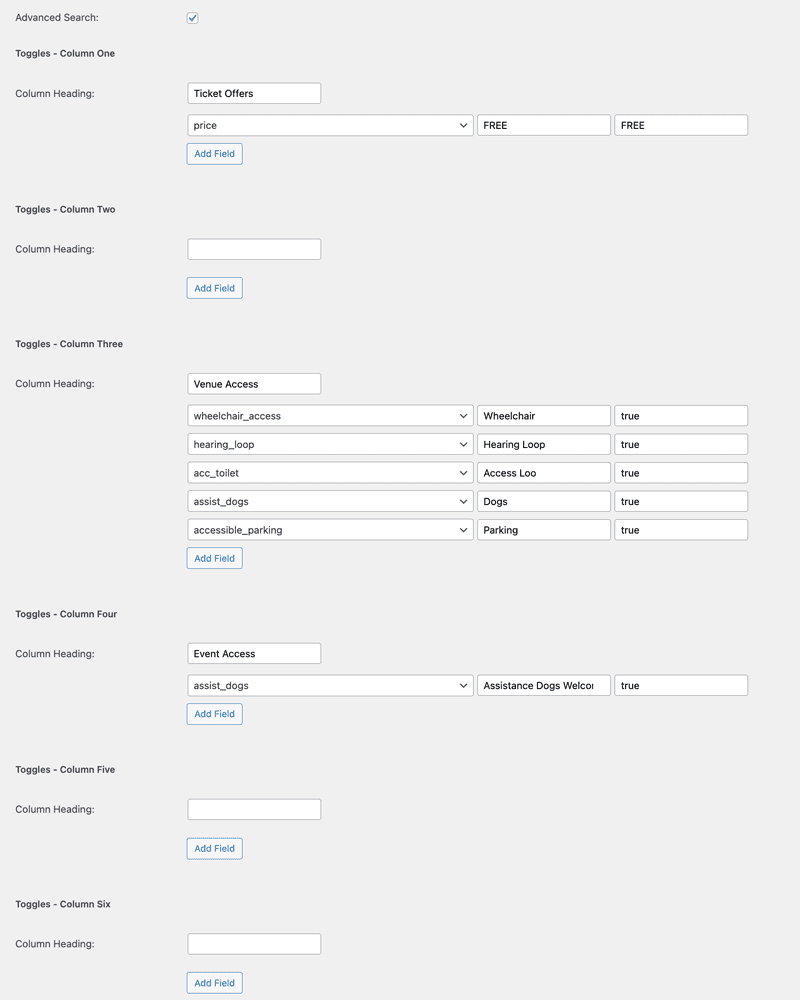
Advanced Search – select this to create more detailed search options on your festival/season criteria
Toggles – build your advanced searches in toggle dropdowns:
Result Tiles
Add more information to the result tiles. For example, you might want to include the venue name. Click the dropdown, select the venue meta key and add it. Style as described above and save settings.
Import / Export
This feature is experimental – please double check your export has downloaded properly.
Performance Template
Use this section to determine what information from Eventotron you want displayed on performance pages (https://your.website/performances)
Works in exactly the same way as the Event template – see above for details.
Venue Template
Import Venue – Venues are imported alongside their events but, if you need to display a venue that doesn’t have any events then please enter its Eventotron ID.
Set up works in the same way as the Event template, however, all the meta keys are from the venue sections in Eventotron rather than Info Collection.
Performance List Template
You can choose whether to show performance list template on Event Template Only or Event and Performance Template. This is an advanced feature – The Event template will always show all available performances. By default, the Performance template will only display details and buy button for the performance the user has selected.
Column One – You can add to or change the meta key data in the first column in the performance list here.
Column Two – works in the same way as above
Column Three – works in the same way as above